Salg
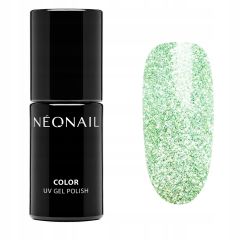


Underwater 7ml
Iridescent semi-transparent Underwater polish: a unique manicure inspired by the underwater world
The iridescent semi-transparent Underwater polish is an unusual proposition for lovers of beautiful nails. Its milky silver base is only the beginning of a fascinating effect that varies depending on the angle of the light. Gold-pink iridescent particles encapsulated in the varnish add a unique charm.
A unique effect from every angle
Underwater will create a delicate and subtle texture on your nails that captivates with its unique style. This polish is the perfect choice for anyone wishing to achieve a unique manicure in express time. It is a true essence of elegance and mystery that evokes the magic of the underwater world.
A unique look
Its slightly transparent texture will give your nails a natural look, adding delicacy and a unique charm to your nail design. When you apply Underwater, you will notice how subtly it enhances their beauty. This polish is ideal for women who want a unique manicure that will catch the eye and bring any look to life.
Let the iridescent semi-transparent Underwater polish take you on a journey into the magical world of underwater elegance. Discover its extraordinary effect and give your nails a unique look that will impress everyone around you.
På lager
SKU
50004-1
kr 145,00
The correct way to get the perfect manicure
We start by preparing the station, where only sterilised tools should be present. Remember to wear gloves and disinfect your hands!
STEP 1
Remove cuticles - this is best done with a milling machine and the picks that suit you best (you can find videos of different picks here). If you don't have a cutter, remove cuticles (dry) with a cutter pick and, if necessary, cut the cuticles with a pair of tweezers.
STEP 2
Matt the nails with a high-grade file (180 or 240) or polishing block, paying particular attention to the area around the nail shafts.
STEP 3
Clean the nail plate of dust using a brush. Apply Nail Prep, taking care not to touch the nail plate so as not to contaminate it again.
STEP 4
In this step, we apply Acid Primer or No Acid Primer or Ultra Bond Extra Strong (recommended to increase polish adhesion).
STEP 5
After the Primer has evaporated (approx. 15s.), apply Smart Base Crystal Clear, curing in the lamp (UV - 2 min. or LED - up to 30s.)
STEP 6
Then apply the first layer of gel polish, cure in the lamp (UV - 2 min. or LED -30 to 60 sec.).
STEP 7
For a better effect and depth of colour, apply a second coat of gel polish, cure in the lamp (UV - 2 mins or LED -30 to 60 secs).
STEP 8
Apply Top Coat or Ultra Top Matt, depending on the effect you want to achieve. Speed up your work by applying Top Thicky No Sticky without a dispersion layer.
If you want to give your nails an original finish use our GALAXY Top No Wipe, which will transform any nail design.
STEP 9
Wipe off the dispersion layer with a dust-free sponge soaked in Cleaner.
STEP 10
Apply oil to nourish cuticles and shine the finish with a cotton swab.
Gel Polish removal
Remove your gel polish with our excellent drill bit for gel polish!